 This is the image of a dream coming true. After many years of saving pictures from magazines and jotting down notes, my dream of having a charming Potting Shed was becoming a reality, thanks to God who has given us more than we need or deserve, and thanks to my dear husband who always lovingly and cheerfully grants my wishes.
 Many people have asked us if we have design plans for the building. We don't. It was all in Danny's head and hands. So here are some pictures of how it was built. You can see more photos inside and out of the finished Potting Shed here.
Design and Preparation
The initial questions in planning for our Potting Shed were how big should it be and where should we place it. We decided on 9'x11', and we selected a sunny spot where the adjoining Kitchen Garden would receive full sun most of the day. We placed the shed itself, however, next to an established pine tree on the north side which "anchors" it to the property and keeps it from looking like it's lost or floating. That really adds to its charming appearance. It looks like it's been there for years and years.
Since I knew I wanted the Potting Shed to be as much a play house as a garden shed, we planned for a lean-to tool shed attached to the side that would house the large garden tools. That was part of the design planning.
We didn't want to sink a lot of money into this project, so we looked for as much re-cycled and lower cost materials as we could find. In planning ahead, we ventured out to our local city's recycling center for building materials. There we found a door for $10 and five windows for $5 each. A pretty good bargain!
Once we got our windows and door back home, we power washed them, let them thoroughly dry and then painted them.
We bought rough hewn hemlock boards from a lumber mill in a local Amish community, reducing our material costs by half.
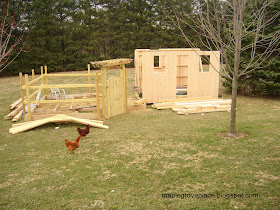
Typical for us, we often work things in a bit of a reverse. In the fall of 2012, we decided we would be ready to build the Potting Shed the following Spring. In order to prepare for that upcoming planting season, we constructed our raised garden beds first so they would be composted and ready for planting. That same Fall, after finishing the garden beds, we staked out the size and placement of the Potting Shed. In the image below, you can see the garden beds on the left side and the corner markers for the future Potting Shed on the right.
Base and Floor Construction
So, come early Spring, the garden beds were composting nicely and we began to construct the Potting Shed.
Any job worth doing is worth doing well. And every job done well is because it had a great supervisor (or two, or three). My Dad, "Butch" is the best supervisor ever, especially since he was a structural engineer. He was keeping an interested, watchful eye on this project!
Truss Construction
You'll need to decide ahead if you're going to build the roof trusses yourself or order them from a lumber yard. If you're building your own roof trusses, you can use the just completed floor as a work surface for building them before constructing the walls.
Wall Construction
It's so wonderful to have dependable help. I want to give a special thank-you here to my brother, Charlie, who gave a lot of his time and energy into this project!
1"x2" boards (battens)were placed over the seams of the 1x10s.
Front and back walls up. Trusses waiting. Supervisor gone.
Side walls being built.
Roofing
Don't forget the hurricane clips on both walls where the trusses sit and the overhangs.
Building the dormer over the door.
Sheeting and shingling the roof.
Lookin' good! The supervisor approves!
Windows and Lean-To Shed Attachment
Windows are installed and the attached tool shed lean-to is built.
The door of the lean-to was double-hinged to fold in half when opened out into the narrow pathway, allowing for a wide opening.
Exterior solid color stain protects the siding and won't chip or peel.
(For ventilation, the roof has an 8" ridge vent, and the overhangs have 1/2" slits with screen stapled to the underside.)
Front Porch
The front porch was constructed with discarded boards a friend tossed our way when he replaced his deck.
That was a quick peek at the Potting Shed design and construction. It didn't cost as much as you might think, thanks to recycled and rough hewn materials.
If you can dream it . . .
You can build it . . .


