
 We remodeled our kitchen several years ago, installing a farm sink and stone counter top, but I just couldn't decide what to do about a back splash on the wall. I thought seriously for a while about subway tile, which I love, but we really didn't want to apply adhesive and grout to the plaster walls that could cause damage or be hard to remove in the future. We wanted to do something less damaging, but what?

I considered a beading board wainscoting to keep the farm house style going, but I just wasn't sure. Then I found several tutorials online that show how to install a DIY shiplap look. We worked up a sample of both styles and pondered them for a few days before deciding to proceed with the shiplap look, and I'll tell you right now I LOVE how it turned out!


We needed to determine how wide we wanted the planks to be and how many rows. We decided on seven rows of 4 3/16" widths. (See specific instructions for determining plank widths at the end of this post.) We found and marked all the studs before beginning the installation and used an air gun nailer and 1 1/2" brads to adhere the planks to the wall, beginning at the baseboard. This photo shows the first installed plank.

As we continued the installation, we used nickels as spacers to create even spacing between each plank, and we placed two nailer brads on each stud.

We continued upward, cutting the planks various lengths so the seams would be offset. We cut the planks around the electrical outlet openings. (See instructions for extending the outlet at the end of this post.)

Here is the finished installation topped off with a 2 1/2" x 3/4" board for the chair rail. We gave it all one more light coat of high gloss paint, filling in the brad holes and trying not to get paint in the spaces between the planks. (When we did accidentally get some paint into the spacing we immediately scraped it out with a single edge razor blade.)

I love the new look, in keeping with my farmhouse style of decorating:


Next, the Backsplash
We used the same width planks to cover the wall area behind our counters. First we attached a "frame" on each end with 1 1/2" x 5/8" boards.

We trimmed the planks to fit around the cabinets and window edges. We filled in any gaps around those tight spots with spackling. Once all the planks were in place, we again applied a final light coat of high gloss paint to fill in the brad holes and cover the spackling.

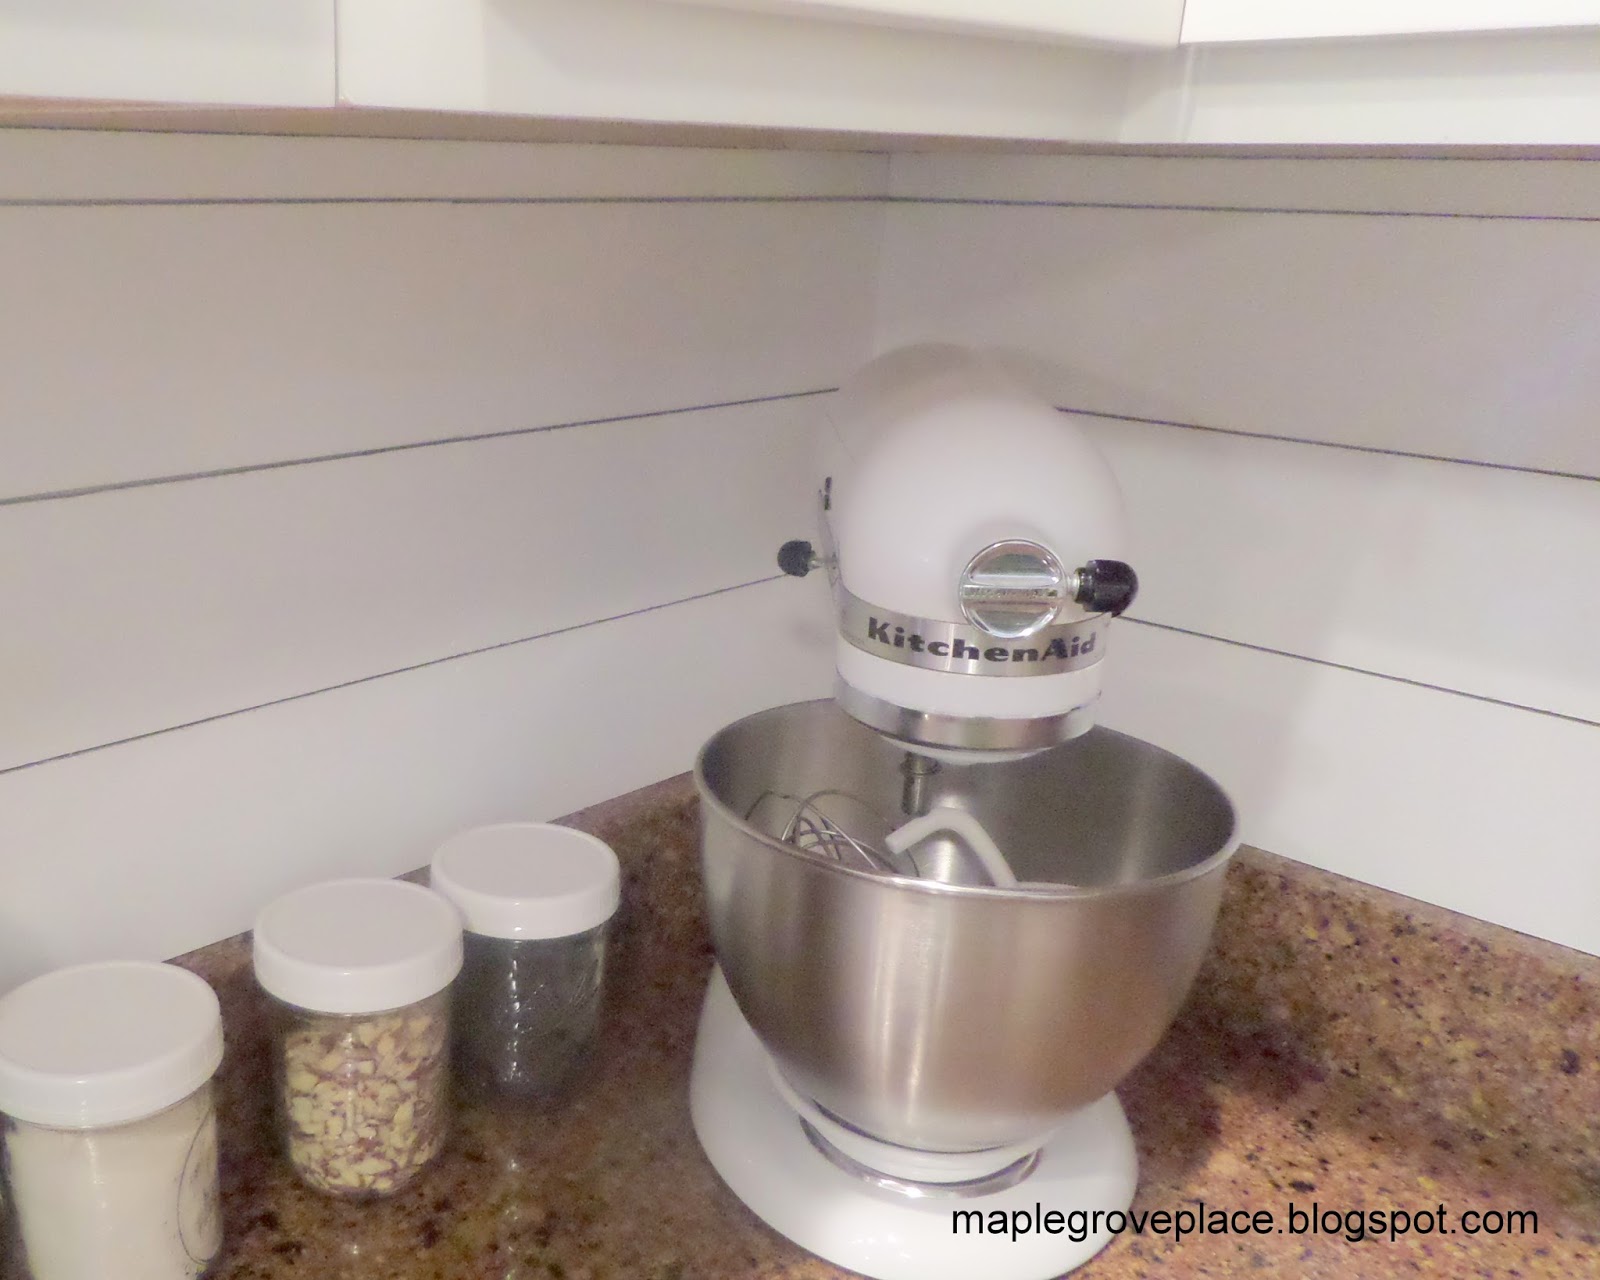

One additional note worth mentioning: The stone backsplash that is an extension of our counters keeps moisture and spills away from the walls. If we did not have this safeguard, I would not have opted to use a wooden backsplash in this work area.

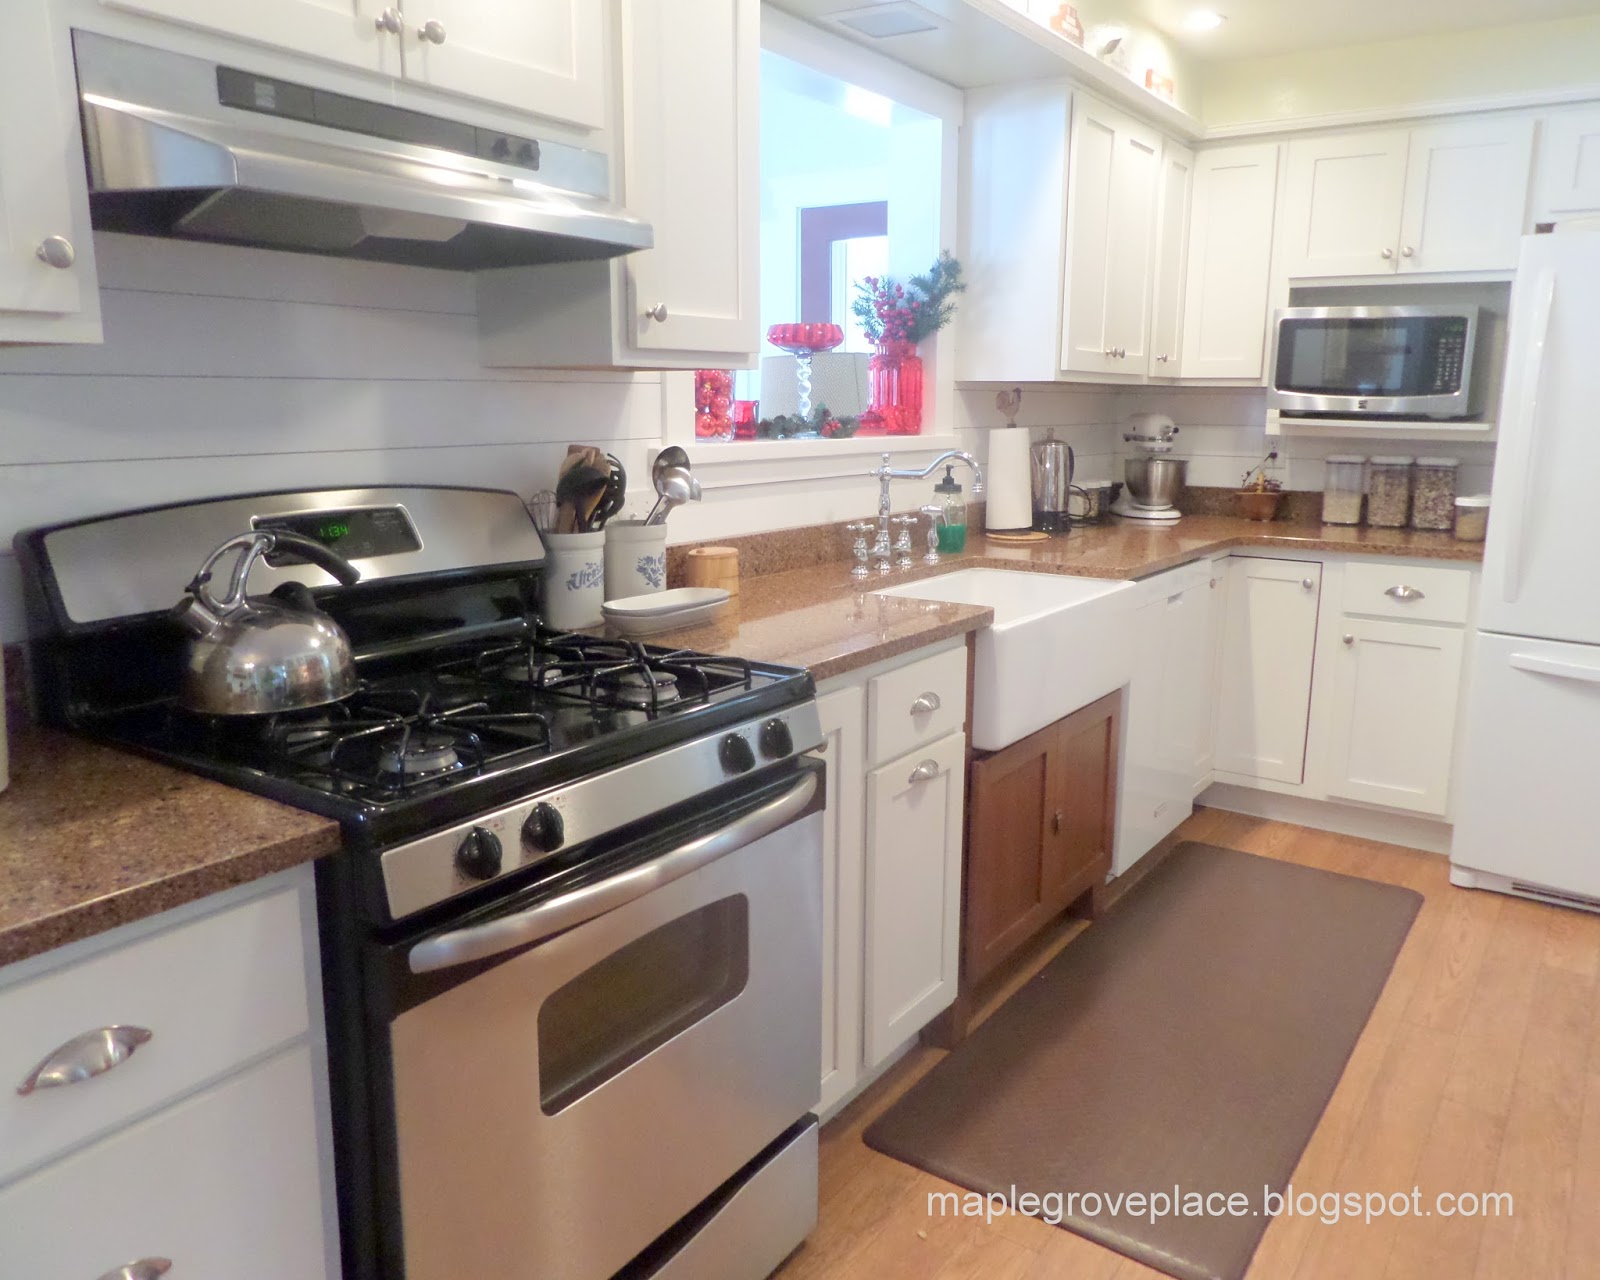

Our farmhouse style kitchen, made better with shiplap, oh yes, shiplap!


Thanks for visiting!
Instructions for determining the width of the planks:
Note: To make these calculations easier, download the free calculator app, FractionPlus.
- Measure the height of the wall surface to be covered from the top of the baseboard to where you want the planks to end, in our case the bottom of the chair rail. (The height of our wall surface to be covered was 29 7/8").
- Determine the size of the space you want between the planks. Using nickels for spacers, our spacing was 3/32". (You could use tile spacers, available in various sizes.)
- Think about the approximate plank sizes and number of rows you would like for your project. For example, we could have had 8 rows of approximately 4" planks or 7 rows of approximately 4 1/2" planks or 6 rows of approximately 5" planks. We decided on having seven rows of planks with 6 spaces of 3/32" between the rows (6 x 3/32 = 9/16" total spacing between rows).
- The formula is: The height of wall to be covered minus total spacing between rows, then divided by the number of rows.
In our case: (29 7/8" - 9/16") = 29 5/16" / 7 = 4 3/16" wide planks.
Instructions for extending the wall outlets (if needed):
- Before installing the planks, shut off the power to the outlet, remove the outlet cover, unscrew the outlet from the work box and gently pull it out of the opening.
- Trim your planks to fit closely around the opening.
- Slip an electrical outlet extender over the outlet and insert it into the opening.
- Screw the outlet through the holes in the extender to the work box.
- Replace the outlet covering.

Visit Maple Grove on Facebook and Pinterest.