I love Christmas trees. So much so, that I put up 15 trees with lights and decorations. They vary in height from this little one-foot tree to a few eight-feet trees. It's not so much that I love the part about putting them up. Sometimes that can be frustrating. But I do enjoy decorating them, each one with a theme, and I especially love looking at them! This is Part 2 of the Christmas Decorating Series. If you missed it, you can catch up with Part 1: The Lights.
We stopped putting up real trees several years ago. It was a hard decision, because I really love the look and smell of real trees. We bought our first artificial tree, and then the second one, and then the third, and we just kept adding to our collection. Some artificial trees have individual sprays that are hooked into the center pole. Others unfold, sort of umbrella-style. We have both types. What we don't have is pre-lit trees. I know a lot of people buy them now, and I have put them up at other places. I personally prefer to work with lighting the tree myself. I find it frustrating to get the pre-lit trees connected correctly, and then when the lights quit working you still have to string them anyhow. In this post, I'm going to demonstrate putting together a tree with the individual sprays of branches and the way I put lights on a tree regardless of the type.
This tree had plastic legs that slid onto the plastic holder. They weren't very strong and broke after a few years. We used nylon ties and duct tape to try to hold it together, but it was wobbly. Tip: I was about to give up on this tree when I came across a universal metal tree holder at True Value Hardware. I don't know why, but it had never crossed my mind to look for one. This holder is sturdy and does a great job of holding our tree steady. It literally saved a tree.
The center pole is set in place in the stand. Tip: I use a green extension cord with outlets placed at intervals and an on/off switch near the plug. They sell these in most Christmas decoration departments. I wire this extension cord vertically on the center pole so that I can plug in lights at various heights on the tree. When I pack up the tree after Christmas, I leave the cord attached so that it is in place and ready to use the next year.
When I assemble the tree, I insert one layer of branch sprays into the base of the pole. Instead of continuing to add more layers immediately, I work with one layer at a time, fluffing the branches and putting on the lights.
I start on the broad side of the spray near the center pole and "outline" the spray with the lights, laying them along one edge coming out toward the point and then along the other edge going back toward the center pole. I keep following this pattern on each spray. This will give you an evenly lit tree with lights both on the surface and in the center. It gives the lights some real depth on the tree, and it keeps the wires hidden from view. You don't seem them traveling up and down from one layer to the next. This is the way I put lights on all trees: real, artificial, sprays like these, and "umbrella" fold-up trees. This lighting pattern is always effective and really pretty.
When you reach the end of a string of lights, plug another set into the first one and continue. Follow the instructions on the light package as to how many strings you can connect to each other. Some newer lights say you can string 10 together, but some lights (and most older ones) say no more than three. (Tip: By the way, I never throw away those plastic covered twist ties that are wrapped around new lights. I have found them to be great for working with crafts. They work especially well when wiring decorations to wreaths and garlands.) After I have strung three strings together, I plug into a new outlet on the center extension cord and start a new series. This shows the tree with several layers fluffed and lit.
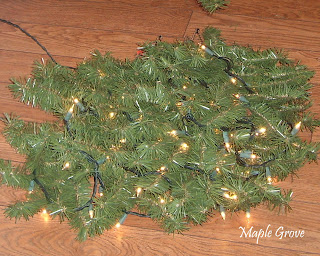
Fast-forward to when it's time to disassemble the tree . . . I gently lift off each spray of branches from the top down and set them on top of each other being careful to keep the lights intact. When I come to the plug, I unplug the string and set that bundle aside. I continue to pile bundles of strung sprays until I have completely disassembled the tree. Then I gently box them. The next year when I put the tree up, the lights are already on the sprays, and I just put them together as I did here, fluffing the branches and adjusting the lights. It make the work go much faster.
And this is what the finished lit tree looks like. I used 600 lights for this 7 1/2 foot tree:
Tomorrow, in Part 3, I'm going to share how to artfully add decorations to this tree.


